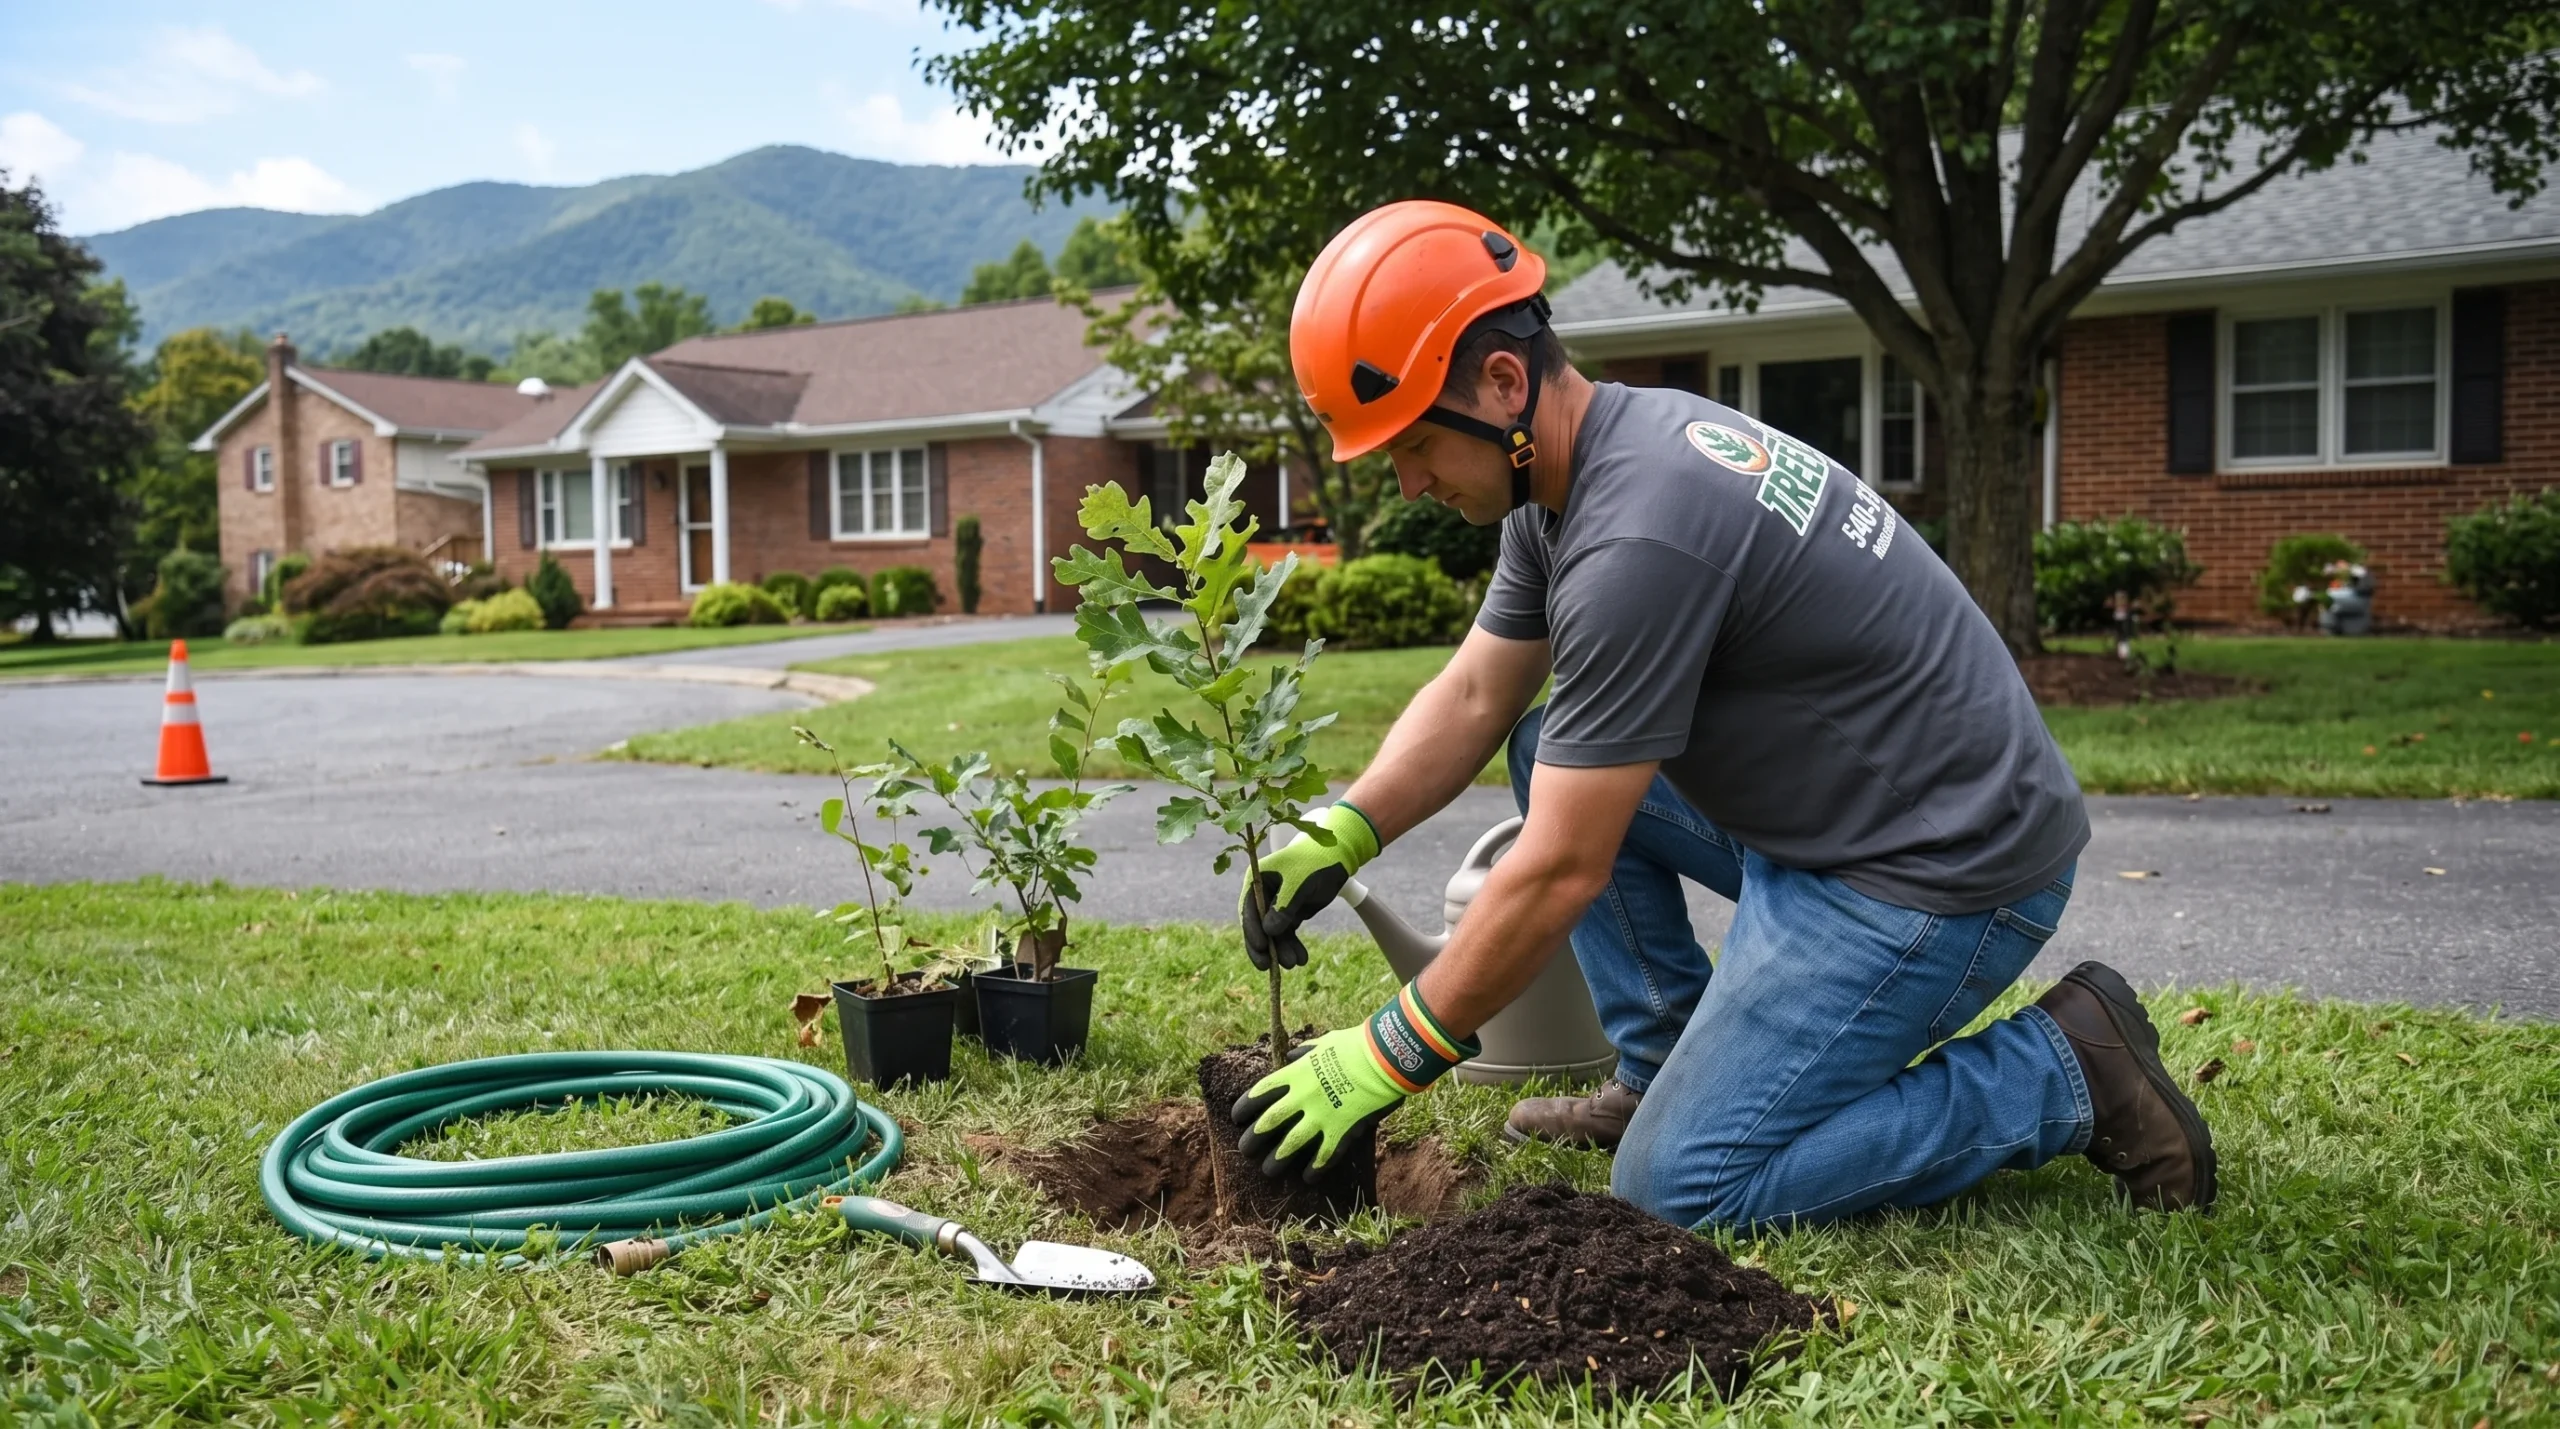
Planting a tree is a long-term investment in your property. A well-placed tree can provide shade, improve the appearance of your yard, support local wildlife, and contribute to a more comfortable outdoor environment. However, choosing a healthy tree is only part of the process. The way you prepare the planting site, position the root ball, and care for the tree during its first few years can influence its ability to establish healthy roots.
For homeowners, understanding how to plant a tree correctly starts with a few essential principles: select a suitable species, dig a wide but not excessively deep hole, keep the root flare visible, and water according to the tree’s needs and local conditions.
Many planting problems begin before the first shovel of soil goes back into the hole. A buried root flare, compacted root ball, or planting hole that is too deep can create problems that remain hidden until the tree begins to decline.
This guide explains how to plant a tree step by step, including the correct planting depth, root-ball preparation, hole dimensions, backfilling techniques, and common mistakes homeowners should avoid.
Why Proper Tree Planting Matters
A newly planted tree must adapt to a new environment while establishing roots beyond the soil it came with from the nursery. During this period, the tree is particularly sensitive to water stress, poor drainage, damaged roots, and unfavorable soil conditions.
Planting correctly helps create suitable conditions for root growth. A wide planting hole allows roots to move into the surrounding soil, while the correct planting depth helps maintain the oxygen exchange needed around the root collar. Appropriate watering supports establishment without leaving the roots sitting in saturated soil.
The goal is not simply to keep the tree upright. It is to create an environment where the roots can develop, access water and nutrients, and support the tree as it grows.
According to university extension guidance, planting too deeply is a particularly important problem to prevent. Excess soil over the root flare can contribute to poor root development, trunk problems, and long-term decline.
Step 1: Choose the Right Tree and Planting Location
Before digging, evaluate both the tree and the site where you intend to plant it. A species that thrives in one yard may struggle in another because of differences in soil, drainage, sunlight, or available space.
Consider the following factors:
-
Mature size: Check the tree’s expected height and canopy spread. Allow room for its branches and roots to develop without conflicting with buildings, driveways, fences, or neighboring trees.
-
Sunlight: Match the species to the amount of direct sunlight the site receives.
-
Soil and drainage: Identify whether the soil is sandy, clay-heavy, compacted, or frequently waterlogged. Different species tolerate these conditions differently.
-
Utility lines: Look for overhead power lines and have underground utilities marked before excavation. In the United States, homeowners can contact 811 before digging.
-
Local climate: Choose a species suited to your region’s temperatures, rainfall patterns, and growing conditions.
Native trees adapted to your area can be worthwhile options, but suitability still depends on the specific planting site. A native species that requires consistently moist soil may not be appropriate for a hot, dry location.
Timing also matters. Many regions favor planting during spring or fall when temperatures are moderate and moisture is more manageable. The best season varies by species, climate, and local weather. Avoid planting when the ground is frozen or when extreme heat is likely to place the new tree under immediate stress.
Step 2: Prepare the Tree’s Root Ball
The root ball is the mass of roots and growing medium attached to the tree. Inspecting it before planting helps identify problems that might otherwise interfere with establishment.
For a container-grown tree, remove the pot carefully and examine the outside of the root ball. Look for roots that circle around the container, form tight mats, or wrap around the trunk. These roots may need correction before the tree goes into the ground.
If the root ball is densely matted, gently loosen the outer roots. Small circling roots can be redirected or pruned with clean, sharp tools. Where the root system is severely tangled, seek advice from a qualified arborist or experienced nursery professional before cutting extensively.
Next, locate the root flare. This is the area at the base of the trunk where it widens and transitions into the main structural roots. Nursery soil sometimes covers this area, so you may need to remove excess growing medium from the top of the root ball until the flare or uppermost structural roots are visible.
Do not assume that the surface of the potting medium represents the correct planting depth.
Different root-ball types require slightly different handling:
-
Container-grown trees: Remove the container completely and inspect the roots for circling or girdling growth.
-
Balled-and-burlapped trees: Keep the root ball intact while positioning the tree. Once it is stable, remove twine around the trunk and cut away as much of the upper burlap and basket material as practical without allowing the root ball to collapse. Synthetic wrapping must not be left to restrict future root growth.
-
Bare-root trees: Keep the roots moist and protected from drying. Remove broken or dead roots and spread healthy roots naturally in the planting hole without bending them into a cramped space.
These preparation steps help the roots make contact with the surrounding soil and reduce the risk of structural root problems developing later.
Step 3: Dig a Wide, Shallow Planting Hole
The dimensions of the planting hole are among the most important details in the entire process. Homeowners often dig a hole that is deep enough to bury the entire root ball, but this can cause the tree to settle below the intended soil level.
A better approach is to dig a hole that is substantially wider than the root ball while keeping its depth limited to the distance from the exposed root flare to the bottom of the root ball.
How wide and deep should the hole be?
For most container-grown and balled-and-burlapped trees planted in reasonably well-drained soil, aim for a hole approximately two to three times the width of the root ball. The sides should slope outward toward the surface rather than forming a narrow, straight-sided pit.
The hole should generally be no deeper than the correctly measured root ball. Remove excess soil from the top if the root flare is buried in the nursery medium before measuring.
Hole width
Two to three times the root ball’s diameter in typical planting conditions.
Hole depth
No deeper than the distance from the exposed root flare to the bottom of the root ball, with firm, undisturbed soil supporting the base.
For example, if a tree has a root ball measuring 20 inches across and 14 inches from the exposed root flare to its base, a practical starting point is a hole approximately 40 to 60 inches wide and 14 inches deep. The final depth must account for the position of the flare and the site’s drainage conditions.
The bottom of the hole should remain firm. If you dig too deeply, add soil back and compact it sufficiently before positioning the tree. Loose soil beneath a heavy root ball can settle, pulling the trunk and root flare below grade.
In poorly drained or heavily compacted soil, a wider, shallower planting area or a raised planting mound may be more appropriate. Simply digging a larger, deeper hole in clay can create a basin that holds water around the roots.
Step 4: Position the Tree at the Correct Planting Depth
Once the hole is ready, carefully lower the tree into position. Lift it by the root ball rather than pulling or carrying it by the trunk. Before adding soil, check that the trunk is upright and that the root flare is visible at the finished soil level or slightly above it, as appropriate for the site.
Why the root flare must remain visible
The root flare marks the transition between the trunk and the main structural roots. This area should not be buried under a mound of soil or mulch.
When the root flare is covered, moisture and oxygen conditions around the trunk base can become unfavorable. Deep planting can also contribute to the development of girdling roots, which grow around the trunk or other structural roots and can interfere with normal growth.
Use a straight board or shovel handle laid across the planting hole to check the intended soil level. If necessary, remove additional soil from the top of the root ball to expose the flare, then adjust the hole depth to suit the actual root system.
Do not confuse a graft union with the root flare. Fruit trees and some ornamental trees have a graft union, often visible as a swelling or change in the trunk, above the root system.
A simple depth check before backfilling can prevent a mistake that is difficult to correct after the tree has settled.
Step 5: Backfill the Hole with the Right Soil
After the tree is correctly positioned, begin filling the space around the root ball with the soil removed during excavation. Remove large stones, trash, and other debris, but avoid routinely replacing the native soil with a heavily amended mixture.
University extension recommendations generally favor using the excavated soil as backfill rather than filling the planting hole with compost, peat, or fertilizer-rich soil. A sharp difference between the amended soil inside the hole and the surrounding soil can discourage roots from spreading outward. In poorly drained ground, it can also contribute to water accumulating around the root ball.
Backfilling should be done gradually:
-
Add soil around the root ball in manageable layers.
-
Spread the soil evenly around the tree so that the trunk remains upright.
-
Gently settle the soil with your hands or light pressure to reduce large air pockets. Do not stomp heavily around the roots.
-
Stop periodically to check the root flare and confirm that the tree has not shifted.
-
Continue until the hole is filled and the surrounding ground is level with the intended planting grade. Do not bury the top of the root ball or the root flare.
Watering during backfilling can help settle soil around the roots. After the hole is filled, water thoroughly to moisten the root ball and the surrounding soil.
Do not add fertilizer automatically at planting. A newly planted tree needs to establish roots, and additional fertilizer is not a substitute for appropriate soil conditions, water, and correct planting depth.
Step 6: Water Thoroughly and Apply Mulch
Newly planted trees need consistent moisture while their roots establish beyond the original root ball. However, watering frequency depends on species, soil texture, drainage, temperature, rainfall, and the size of the tree.
Water slowly and thoroughly after planting so moisture reaches the root ball. During the following weeks and months, check the soil rather than relying on a fixed schedule. The root ball can dry out even when the surrounding soil feels damp, particularly in warm or windy conditions.
Sandy soils typically drain faster than clay soils, while poorly drained soils may remain wet for extended periods. Adjust watering accordingly. The goal is moist, aerated soil, not persistent saturation.
Apply mulch correctly
Spread an approximately 2- to 3-inch layer of organic mulch, such as wood chips, over the planting area. Extend it outward as far as practical to cover the developing root zone, while leaving a clear gap around the trunk.
Keep mulch several inches away from the trunk, ideally around 3 to 6 inches, and do not pile it against the bark. A thick mound of mulch around the trunk can trap moisture, damage bark, and encourage roots to grow in undesirable locations.
Mulch helps moderate soil temperature, conserve moisture, and reduce competition from grass and weeds. It does not eliminate the need for watering or make poor drainage acceptable.
Step 7: Monitor the Tree During Its Establishment Period
Planting is the beginning of the process, not the end. A newly planted tree needs regular monitoring while its root system adapts to the site.
Check the soil moisture around the root ball, especially during dry spells and periods of unusually warm weather. Watch for wilting, scorched leaf edges, yellowing foliage, or standing water. These signs can have several causes, so assess soil moisture and drainage before increasing or reducing irrigation.
Inspect the tree periodically to make sure it remains upright and the root flare has not become covered by settling soil or accumulating mulch. Remove competing weeds and grass around the base without damaging shallow roots.
Staking is not necessary for every tree. Use it when the root ball is unstable, the site is particularly exposed, or the tree cannot remain upright on its own. Supports should allow some natural trunk movement and should be removed when no longer needed, rather than left in place indefinitely.
Avoid unnecessary pruning at planting. Remove broken or clearly damaged branches, but do not heavily prune a healthy canopy simply to compensate for root loss.
The establishment period varies by species, tree size, and growing conditions. Continue checking moisture and tree stability throughout the first growing seasons, adjusting care to rainfall, temperature, and the tree’s response.
Tree Planting Reference Table for Homeowners
The following table summarizes practical planting guidelines for typical landscape trees. Measurements are general starting points, not universal specifications for every species or soil condition.
| Planting factor | General recommendation | What to avoid |
|---|---|---|
| Planting hole width | About 2 to 3 times the root ball’s diameter | A narrow hole that restricts root expansion |
| Planting hole depth | No deeper than the distance from the exposed root flare to the root ball’s base | Digging too deep or using loose soil beneath the root ball |
| Root flare | Visible at or slightly above finished grade, depending on site conditions | Burying the trunk flare beneath soil or mulch |
| Container preparation | Remove the pot and inspect for circling roots | Leaving the container on or ignoring tightly wrapped roots |
| Balled-and-burlapped preparation | Preserve root-ball stability, remove trunk ties, and remove accessible wrapping material | Leaving restrictive twine or synthetic wrapping around the trunk or roots |
| Bare-root preparation | Keep roots moist, remove damaged roots, and spread healthy roots naturally | Allowing roots to dry out or bending them into a cramped hole |
| Backfill material | Generally use excavated native soil, free of large debris | Automatically adding large amounts of compost or fertilizer |
| Watering | Water thoroughly after planting and adjust to soil moisture, drainage, and weather | Allowing the root ball to dry out or keeping soil waterlogged |
| Mulch | Approximately 2 to 3 inches over the root zone, kept away from the trunk | Building a mulch mound against the bark |
| Staking | Use only when stability or site conditions require it | Tight ties or supports left on indefinitely |
These recommendations are consistent with guidance from university extension programs, including Iowa State University, the University of Maryland, Colorado State University, and the University of New Hampshire. Site conditions and species-specific instructions should take precedence where they differ from general guidelines.
Common Tree Planting Mistakes to Avoid
Even a healthy tree can struggle when basic planting practices are overlooked. The following mistakes are worth checking for before you finish the job.
1. Planting too deeply
This is one of the most consequential errors. The top of the nursery root ball is not always the correct reference point because excess soil may cover the root flare. Expose the flare before determining the final depth.
2. Digging a hole that is too narrow
Roots need to extend into the surrounding soil. A hole only slightly wider than the root ball can make that transition more difficult, particularly in compacted ground. Widen the planting area where practical.
3. Loosening the soil beneath the root ball
Excavating deeper than necessary and then placing the tree on loose soil increases the risk of settling. Keep the base firm so the root flare remains at the intended height.
4. Ignoring circling or girdling roots
Tightly circling roots may continue growing around the trunk or other roots. Inspect container-grown trees carefully, correct manageable root defects, and seek professional advice if the root system is severely deformed.
5. Adding too much compost or fertilizer
Amending every planting hole is not a universal best practice. Differences between the backfill and surrounding soil can affect water movement and root expansion. Use soil amendments or fertilizer when supported by a soil assessment, species requirements, or local horticultural guidance.
6. Watering without checking the soil
Both drought stress and excess moisture can harm a newly planted tree. Check the root ball and surrounding soil, then adjust watering to the conditions instead of following an inflexible daily schedule.
7. Piling mulch against the trunk
Mulch belongs over the root zone, not against the bark. Keep the trunk base clear and maintain a moderate layer that does not obstruct the visible root flare.
8. Choosing a tree that outgrows its location
A small nursery tree can eventually become a large canopy tree with extensive roots and branches. Check mature dimensions, utility conflicts, and the amount of available growing space before purchasing.
Correcting these issues at planting time is generally easier than trying to address them after the tree has become established.
Frequently Asked Questions About Planting a Tree
How deep should you plant a tree?
For most landscape trees, the planting hole should be no deeper than the correctly measured root ball, from the exposed root flare to the bottom. The root flare should remain visible at or slightly above the finished soil level, depending on drainage and site conditions.
How wide should a tree planting hole be?
A common recommendation is to make the hole two to three times wider than the root ball. Wider holes can be especially useful in compacted soils because they create more space for roots to spread into loosened soil.
Should you put compost in a tree planting hole?
Not automatically. For most routine plantings, use the excavated soil as backfill. Soil amendments may be appropriate in specific circumstances, but adding compost without considering drainage and soil conditions can create problems rather than solve them.
How often should you water a newly planted tree?
There is no single watering schedule that works for every tree. Check moisture in the root ball and surrounding soil, account for rainfall and temperature, and water when needed. The objective is to keep the root zone adequately moist without leaving it saturated.
What is the best time of year to plant a tree?
Spring and fall are often suitable planting seasons in much of the United States because temperatures are generally moderate. The ideal timing depends on your region, the tree species, local weather, and whether the ground is workable.
Plant with Confidence: How All Natural Tree Experts Can Help
Learning how to plant a tree properly gives homeowners a strong foundation for creating a healthier, more attractive landscape. The essential steps are straightforward: choose a suitable species, prepare the root ball, dig a wide and appropriately shallow hole, expose the root flare, backfill carefully, and provide consistent aftercare.
However, not every planting site is straightforward. Compacted clay, poor drainage, severely circling roots, limited planting space, and conflicts with utilities can require a more tailored approach. Recognizing these issues before planting can help homeowners avoid preventable problems.
If you need guidance with tree planting, tree health, or other landscape tree concerns, All Natural Tree Experts is a resource to consider when evaluating professional assistance for your property.
Visit All Natural Tree Experts to learn more about the company and explore its tree care services. Before arranging work, discuss your property’s specific conditions, the type of assistance you need, and the appropriate approach for your trees.
A successful planting project begins with sound decisions and careful preparation. Getting the fundamentals right gives your tree a better opportunity to establish itself and contribute to your landscape for years to come.
Choose the solution based on your property’s needs, not simply on the name of the service.
Schedule Your Free Consultation
 Call us: (540) 634-6572
 Email: sales@allnaturaltreeexperts.com
Our Locations
 Christiansburg
114 Pepper St SE Suite A, Christiansburg, VA 24073
Roanoke
3154 Brandon Ave SW, Roanoke, VA 24018
Charlottesville
310 Avon St #2, Charlottesville, VA 22902